Printing patterns.

If you are a member of any sewing group on Facebook then I am sure you have heard about pdf plotting. It’s a website that you can upload your A0 or shop copy patterns too and get them printed out. They are printed on large sheets of paper and then are shipped to you so no assembly required from you, no taping or putting anything together! As soon as they arrive they are ready to use. I’ve been waffling on if I wanted to do this or not. I am not the best at computer stuff and I thought for sure that I was going to mess it up. They have directions on the website making it pretty simple to use. I decided that I was just going to print off all the patterns that I had A0 copies of that way I wouldn’t have to worry about printing off a pattern at home and piecing it together before I could use it. I printed out all of the Cashmerette Patterns and I can’t wait to use them, so excited! Now the only problem I did run into is I was under the assumption that all the shop patterns were just going to be one page. This is not always the case! Check each pattern you upload to see how many pages it is. I didn’t do that but luckily the people at PDF Plotting sent me an email and told me what I did wrong and asked me to correct it before they even started printing. I sent them the price difference and they started printing my patterns right way. So even if you think there is a good chance you might screw it up I would still give this company a go. They seem to check things before starting the printing process and make sure it’s correct before starting. I will definitely be using this company again to print out my next batch of Indie bought patterns.

20180517_161342

Now I need to figure out how to store these patterns so they don’t get ruined.


Twirly Skirt for my bestie

I love making things for people, especially when I know that the things I make are appreciated and loved dearly. There are few people that I will willingly make things for, I’ve got to really love ya haha. One person, I do love making things for is my dear cousin who has thoroughly enjoyed and loved everything I’ve made her so far. I decided for her birthday I wanted to sew her a couple more things. With the excuse of it being a birthday present I bought enough fabric to make her two projects, firstly a Twirly Girl Skirt for Women and the Agnes both from Halla Patterns. I believe you can get both of these patterns for free if you join the Halla Pattern group on Facebook.

For the Twirly Girl Skirt, I bought some double brushed poly from Sly Fox Fabrics in the color: Saucy. Sadly they are currently out of this fabric which breaks my heart. I didn’t realize how much I loved it until I seen it in person and now I wish I would have bought some for myself. I keep stalking the site hoping they will restock it. This picture does not do the fabric justice at all, it’s so vibrant and lovely in person.20180613_193735

I was able to get her measurement while I was back in Michigan but also learned that she was expecting. So I knew I needed to pick something that would work for her now and with her expanding belly so that is why I went with the double brushed poly for the fabric. It has amazing stretch and it’s so soft like wearing your most comfortable pair of pajamas all day. With the pattern I  chose the longer waistband option for the Twirly Skirt, hoping that it would give her comfort and a little support as her belly grows.

It was a super quick cut out and sew with only a couple of pieces to sew together. I think sewing them hem on the skirt took the longest out of the whole process. It is definitely something you can easily sew in a day with a few spare hours.

20180618_202003

I used this as basically my practice muslin. I had her measurements but because she wasn’t with me I wasn’t 100% sure it would fit. Since both patterns were Halla Patterns I decided to cut and sew her size and send this one first to make sure it fit and that it wasn’t too big or anything. It’s so hard to judge by just looking at the finished garment.

It ended up fitting her perfectly! Maybe a hair too long since I was going for knee length but the fit was perfect! So now I am working on her Agnes we decided to do knee length dress with short sleeves. She picked the fabric for both projects so I know she’ll love it when it’s done. Fingers crossed the Agnes fits as good as the Twirly Skirt does.

Little’s Dino shirt fights back.

Since I made Big a Lumberjack shirt from Pattern for Pirates I, of course, had to make one for Little too. I thought because I had already made the shirt once before that making it a second time would be a breeze. I was so wrong.

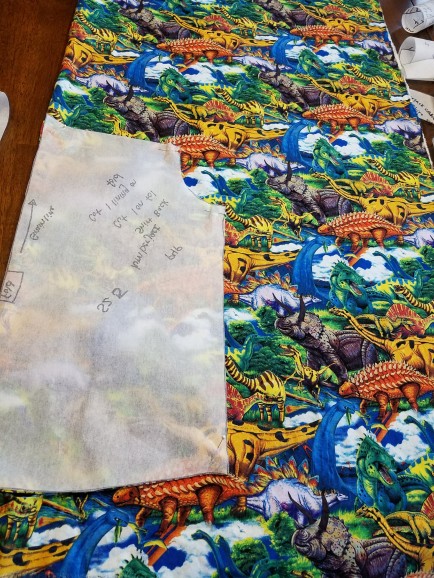
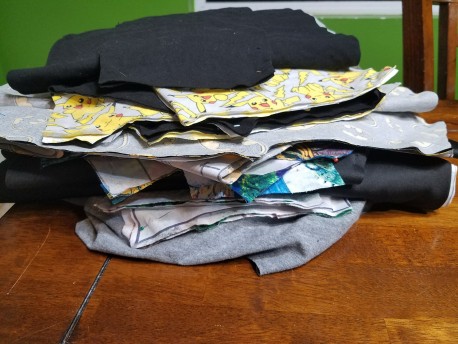
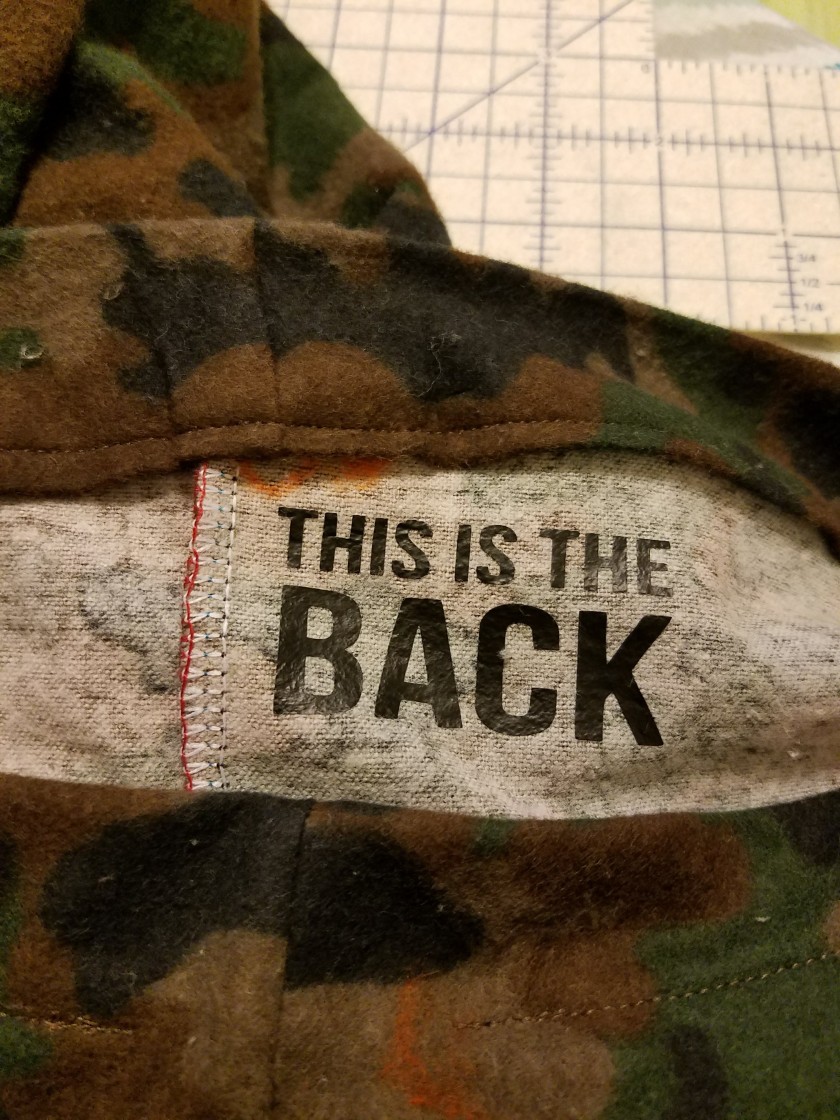
First, by the time I got around to sewing the shirt, I no longer had all the pieces. This was especially frustrating because I had taken extra time to fussy cut all the pieces so everything would match and be lined up. It took me forever to measure, cut and line everything up taking into account the seam allowance that I was so happy to be done cutting this shirt. When I dug it out of the pile to finally sew it I was missing the cuffs, the collar and the back piece. I am sure one day I will find them in the giant mess of fabric I have but I dug around forever and they were just gone, totally disappeared. Luckily I had leftover fabric so I set to cutting out the pieces I was missing. I reused to fussy cut anything and just slapped the pattern on and started cutting. I was so mad that I had misplaced pieces that I wasn’t paying attention to what I was doing and I cut the back piece out upside down. This was a big problem because it was a directional print fabric. I had just enough fabric to cut out another back piece and all my missing pieces. I was finally set to start sewing and I told myself from now on I am going to put all cut pattern pieces in Ziploc bags so I didn’t have to go through this again. Right now I just throw them on top of the fabric pile and call it a day, that obviously isn’t working.

I am finally sewing along, things are going great and I get to the sleeves. Well for some reason I didn’t mark the correct placket length on the pattern piece and I ended up cutting the placket way, way too long. I believe it was only supposed to be a couple of inches and I ended up doing five or something like that. So I had to cut out a whole new sleeve. I was barely able to squeeze a sleeve out of my leftover fabric but I just my upside down back piece and thanked my lucky stars I overbought fabric for this project.

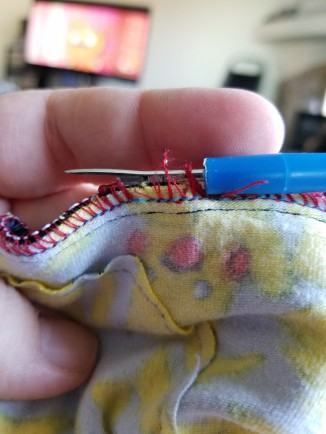
Once again I am sewing along on these sleeves that I am really starting to hate and I sew the binding onto the placket I take these very long-nosed, pointy scissors and go to cut my threads and cut a huge hole in my sleeve! I couldn’t believe I had been so careless and cut a hole in my project. Now, I didn’t have enough fabric for another sleeve so I  took two long pieces of scrap and sewed them together to make a piece of fabric big enough to cut out a whole new sleeve. I kept telling myself that this is just my muslin so it’s totally ok for it to not be perfect, I am basically just seeing how it fits. This mantra was going through my head none stop because I wanted to take this project and just throw it in the trash.

20180614_180637

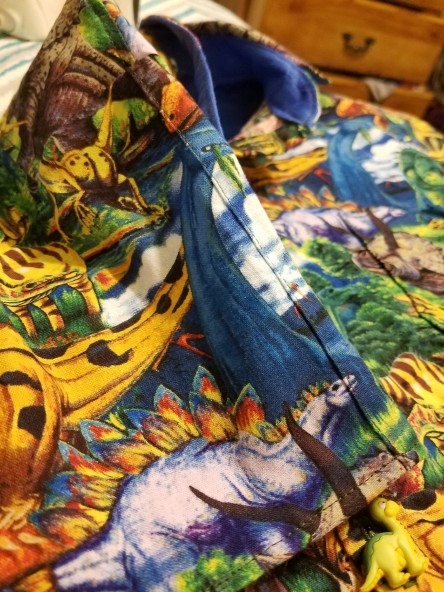
Third time is supposedly the charm and I was now sewing the sleeve for the third time. I sewed the binding on my placket and I somehow sewed it in totally incorrectly leaving a giant crease in the button placket that refused to lay right now matter what. Now I could have just torn it out with my seam ripper but I was at the end of my patience so I just took some scissors and made the shirt into a short sleeve shirt and we all lived happily ever after.

20180614_180608

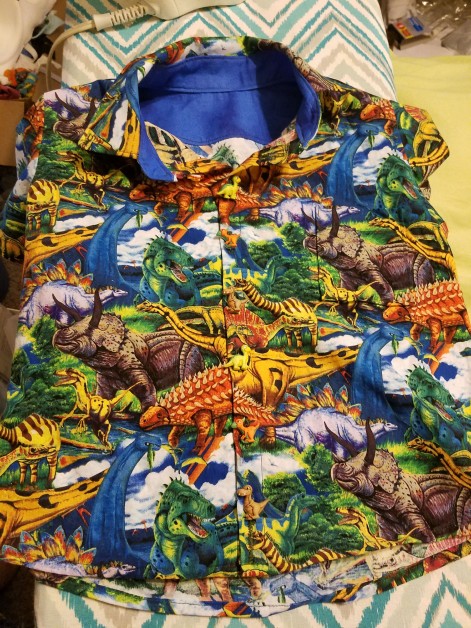
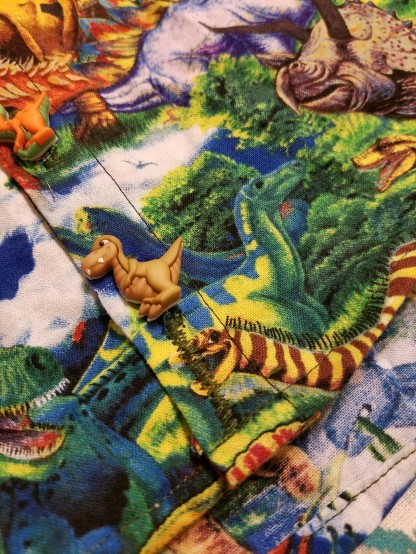
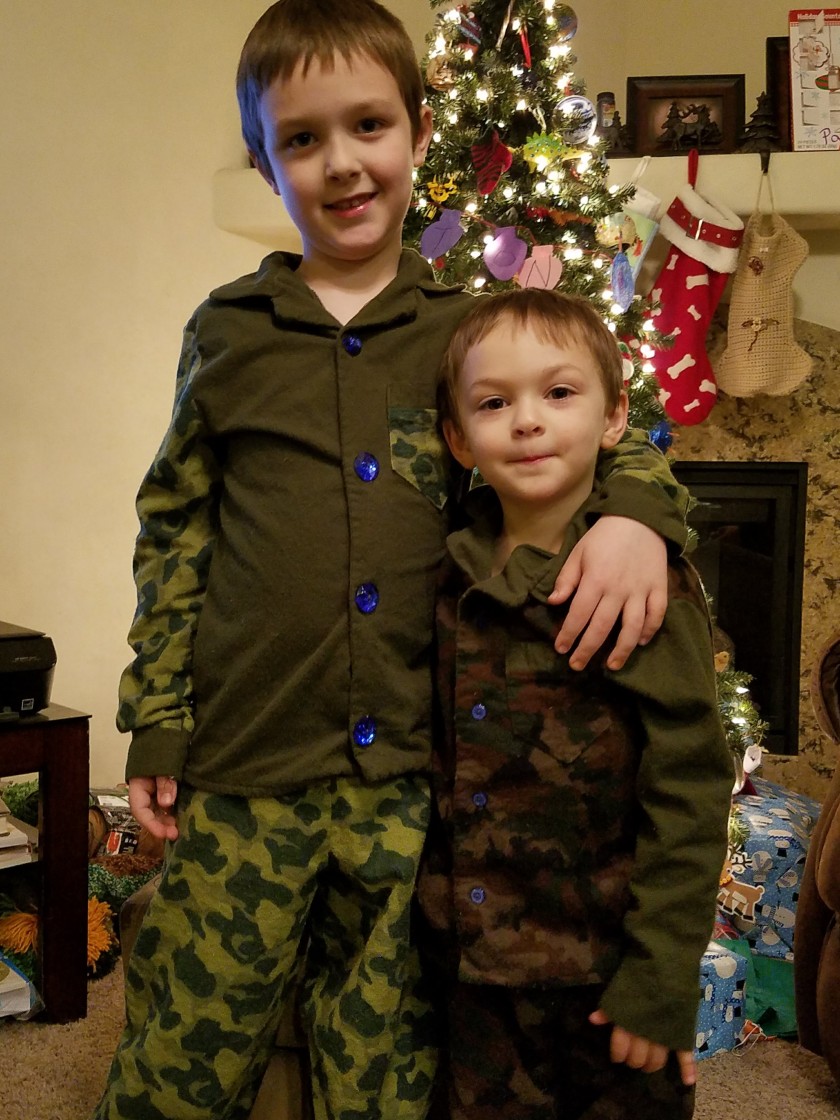
Haha, of course, that didn’t happen. I ripped another hole in the fabric cutting my buttonholes out and when I was all finished Little refused to wear it because he no longer liked Dinosaurs… The story of my life. He did finally try it on but refused to get a picture in it. It’s too short and too big. At least this is just the muslin…

20180614_180640

Big’s Batman shirt.

I am not sure if anyone remembers but back in Januray, I cut out a bunch of different projects so that whenever I had a minute I could spend it sewing instead of cutting and drafting patterns. It worked out fairly well, there are some things I plan to change about my method of storage that I will talk about in another blog. Anyways, I cut out two Lumberjack Shirts from Patterns for Pirates one for Big and one for Little.  I bought some cheap cotton fabric from Walmart that I was basically using as a muslin that I could hopefully use at the end. Big picked Batman fabric for his shirt. The shirt itself was a fairly easy sew except for the placket on the cuff. I couldn’t get it to look or lay right no matter what I did. Next time I do this pattern I am going to see if I can find a helpful video. Sometimes for me, it’s easier to understand something after you watch someone else do it. I made the collar and the inside of the cuffs with a yellow and I thought it turned out really cute. Big really liked the shirt at first.

It was a really fun sew and I learned a lot about shirt construction sewing it up. Big was super excited to wear his new shirt to school but unfortunately, the other kids at school picked on him because it was Batman, they told him that Batman is for babies. He now refuses to wear it at all. I feel bad that that happened to him and a shirt he really loved he now won’t wear at all. The shirt ended up fitting him pretty well and I think he looks adorable in it. Kids will be kids though.

20180421_195607

Sewed a shirt for myself, finally!

I finally sewed up my Cashmerette Concord t-shirt. I used a cheap knit fabric that I bought for a couple of bucks from Wal-mart. I think I did a 22 bust graded out to a 28 waist but it been so long since I cut it out that I can’t remember and of course I didn’t write it down. I also remember making a biceps adjustment on it but it still wasn’t big enough because after I finished there was a definite pull on the fabric there. I am pretty happy with the rest of the fit so now I just need to make adjustments to my arm pattern pieces and try again. I was thinking of just cutting the arms off this practice one and sewing new ones on but haven’t decided yet. I can’t really wear it as is and I have extra fabric left over.

I need to buy a notebook to start keeping track of the sizes I cut out for different patterns. I keep saying I am going to do it but I always forget.

Here is a picture of me just finishing up. It’s a bathroom picture because it’s the only big mirror really in the house. I am also wearing my pajamas. The official outfit for sewing. The line down the front is also a washable marker. I use it to mark all my patterns.

20180407_170454.jpg

Big and Little and Pikachu.

I finished the boy’s shirts a few weeks ago it has just taken me forever to get a post up about them. Between days off and sickness sewing and blogging has been on the back burner. Of course, after sewing them all up both boys went through a growth spurt. The shirts still fit but they won’t for much longer. The bad part is I have another shirt for both of them already cut out in the old size. Live and learn I guess. It won’t stop me from pre-cutting large amounts of patterns before sewing but hopefully next time I do that I can actually get the time to sew them all up before a new growth spurt happens.

20180127_124444.jpg

I used the Pattern for Pirates Jolly Roger Raglan for both shirts.  Big wanted long sleeves with thumb cuffs and banded hem. It also has a lined hood and inseam pockets. 20180127_140440(0).jpg

For Little, I did short sleeves with a banded hem. He also had a lined hood and a kangaroo pocket.

The Jolly Roger Raglan is a great beginner project for sewing with knit fabric. It was the very first pattern I used and the first shirt actually looked like a shirt! She gives you great step by step directions in all her patterns. If you are on the fence about sewing with knit you should definitely give it a try.

Second worse part of sewing.

Ripping things out! I was busy sewing along trying to finish my eldest sons Pikachu shirt because he is supposed to play in a Pokemon tournament this weekend. In my hurry to finish it in time I sewed the bottom band on backward. The big seam was right in the middle of the front of the shirt. So seam ripper to the rescue and now I am back on track and will hopefully get this shirt finished in time. 20180125_155617.jpg20180125_160430.jpg

The pattern I am using is Jolly Roger Raglan with the add-on pack. You can’t really tell but it has inseam pockets, thumbhole cuffs, and a lined hood when I am all done. I can’t remember where I purchased the fabric but I did get it on a great sale because the red on the cheeks and mouth didn’t line up correctly and it’s slightly fuzzy. It was considered flawed fabric so I bought it really cheap. The solid colors were bought at Purpleseamstress Fabric it’s where I buy almost all of my solid colored knits.

The worse part of sewing…

I’ve been cutting out patterns and projects for the past week and a half. The longest week and a half ever! I ended up cutting a total of 6 projects and I was hoping to get 2 cut out a day but of course, that didn’t happen. Between snow days and sick kids, it was hard getting everything done. It’s also a pain because I have to use my dining room table to cut and I also use that to serve dinner so every dinner time I have to pick up and move everything off the table so it can be used for dinner. Really wish I had a dedicated place for cutting out patterns and fabric that would make life so much easier!

I am trying a few new to me patterns like the Lumberjack shirt from Pattern for Pirates and the Concord t-shirt from Cashmerette. I’ve been looking for a nice and easy button-up shirt pattern so I am hoping that the Lumberjack shirt is just that. I have also been trying to make more things for myself but I always find it’s a  harder task with my plus size pear shaped body. Cashmerette are all patterns for curvy girls. I’ve made her Appleton Wrap Dress before and I loved how it turned out. It’s not finished yet, mainly because I ran into a fabric problem but hopefully I will get that squared away this year. I really want to wear it.20180120_165149.jpg

The dino fabric was made into one of the Lumberjack shirts. I also did my first attempt at pattern matching with this so fingers crossed I did it right.

20180123_191825.jpg

Even though I feel like cutting out fabric is the worse part and I hate doing it, I love doing it in bulk like this. With young kids and little time, it’s nice to be able to just pick up a project and go whenever I have a spare minute or two.

Can’t wait to get sewing!

Clownfish Blanket that almost broke me.

My youngest is obsessed with Nemo. We have Nemo toys, bedding, clothes…his love for that little clownfish is strong. I knew I wanted to make him a clownfish blanket and I first came across this knitted version here. It was perfect! I planned on making it for Christmas but like most things, it kept getting put on the back burner and suddenly it was November and time had run out to knit him a blanket.

I quickly came up the idea that I would just sew one. How hard could it be to just wing a pattern and get this done? Harder than I thought. I quickly sketched out what I wanted it to look like. Took some quick measurements of my kid and started my adventure.

20171204_115857.jpg

I ended up cutting the black part of the stripes and sewing them into tubes. Each stripe had two black stripes and of course, I put stripes on the back because I am full of crazy so I had 12 tubes that I had to turn right side out. All I had to turn these tubes was a safety pin…that’s it. I ended up with blisters on my thumb and I have since learned that they make a handy little tool that makes turning tubes right side out much easier. Wish I would have know that earlier. 20171207_134349.jpg

I made the back slighter larger than the front because I originally planned to cut a slit in the back to make it easier to get into and out of. I never actually got around to cutting the slit and I figured when my son gets a little bigger and it gets harder to use than I will cut it because honestly, I was sick of sewing this toward the end.

20171213_140907.jpg

This is a picture of all the fins (tiny and regular) and the tail. I had the hardest time attaching the tail to the body of the blanket. I am sure there was probably an easier way to do it but I did it the way that ended up snapping two sewing needles so I am guessing it was the wrong way. I did get it attached though.


20171225_080753.jpg

Not the best picture but he loves it. He’s swimming in the picture as I am sure you can tell. It was the very first present he opened on Christmas day and he instantly had to crawl inside of it to test it out. I wish the stripes looked better but he really doesn’t care about that. He now sleeps with his fishy blanket every night and that always makes a sewing mama’s heart melt. Worth it.


Christmas Pajamas in the Nick of Time

I always make everyone some new pajamas to wear on Christmas Eve. I have only been doing that for a couple of years but it’s one of those traditions that I really enjoy. Now that the boys are older, I let them pick out their own fabric and buttons and sometimes you can end up with a pretty silly looking garment but they love it so I try to bite my tongue when they pick things that do not look good together.

This year I decided to try out a new pattern. The eldest boy wanted a button up shirt for his pajama top and I couldn’t find one I liked through the big pattern companies that would actually fit him and his little brother. After searching I found a nice indie company that had sizes that would fit my eldest and youngest, matching pajamas! So I went with the company Sew A Little Seam. The pattern I used was the  Holiday Night Pajamas the chest sizes go from 19” to 30” which was great because it was exactly what I needed. It also had piping which I thought added that extra something special. I’ve never done piping so I was excited to try it out.

I went with flannel for the pajamas and both boys picked out camouflage colored flannel. One had a lighter green background and the other had a dark olive green background. I picked a nice green color for the piping. I made sure I bought a half yard extra of each color because I always like to overestimate what I might need. Somehow this time that didn’t work out and I was to short on fabric! Luckily I had bought the contrast fabric because I ended up using it to cut the remaining pieces that I wasn’t able to cut for the main fabric print. So I had to sacrifice my piping which made me so sad. I know it’s silly but I was really looking forward to the piping. Here’s what the pajama tops looked like with the contrast fabrics. 20171222_193045.jpg

You can see how much fabric I was missing. All the solid green was supposed to be camouflaged fabric. I don’t think it turned out terribly or anything I just can’t believe how short I was on fabric. I couldn’t find my receipt to see how much I bought to make sure it was cut correctly but from now on with flannel, I am buying a yard extra…just in case. Next year the pajamas must have piping!

I also added these iron-on tags to the back of each pair of pants. The boys are constantly putting their momma made items on backward so I am hoping that these tags stop that. This is actually a free template from Patterns for Pirates she has tons of great patterns on her site and I love the Jolly Roger Raglan for the boys. That is my go-to t-shirt pattern for them. Anyways, the template can be found here I used a friends Cricut machine to cut these out but I believe you can use a printer to make these too. In case you are wondering all the orange marking on everything is actually Crayola super washable markers. I use them to mark up all my sewing patterns and I haven’t sewn a fabric yet that they didn’t wash out of. 20171224_145533.jpg

Here are my boys modeling their finished pajamas on Christmas Eve. The blue buttons were picked by each boy. I know they look silly but what can you do.

20171224_191834.jpg